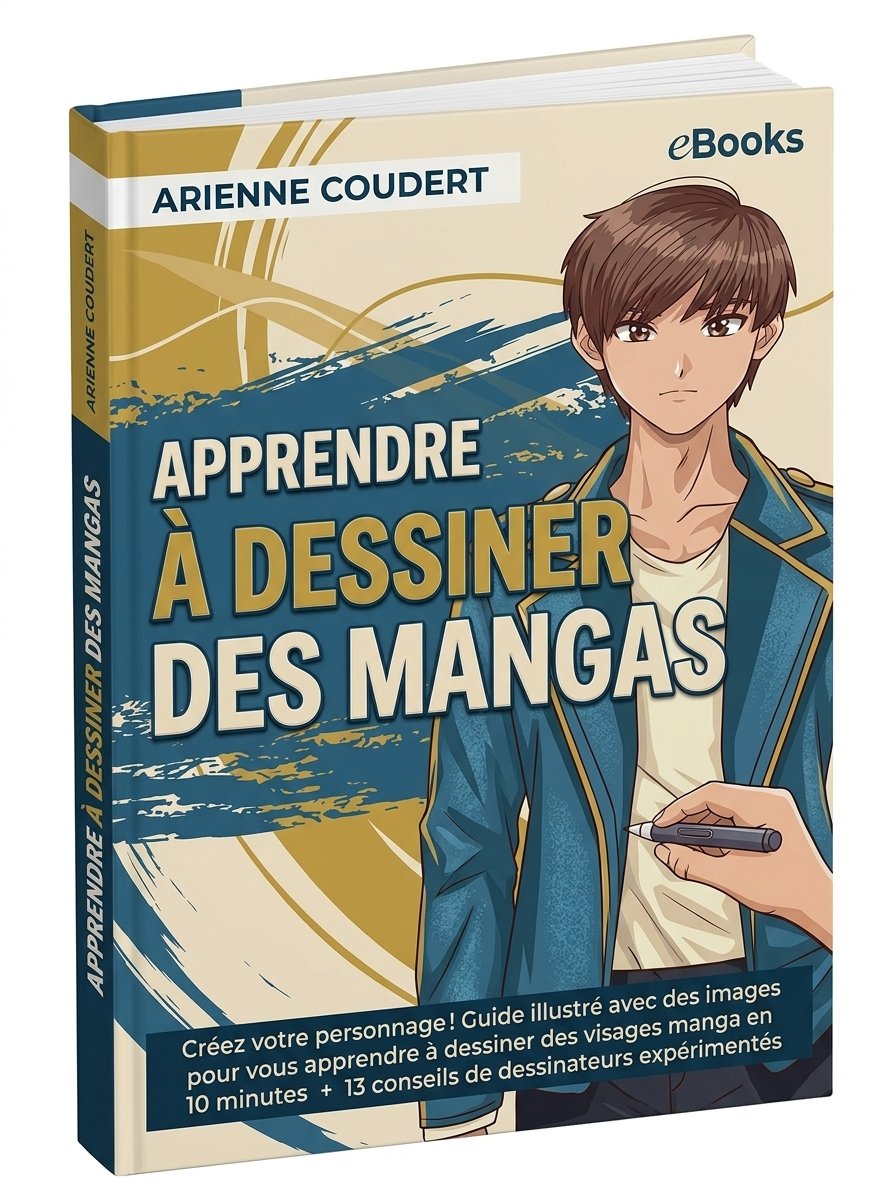
Apprendre à Dessiner des Mangas Créez votre personnage Guide illustré avec des images pour vous apprendre à dessiner des… begins with a single blank page and a spark of imagination. Every manga character starts as a circle, a line, a shadow. Yet beginners freeze, overwhelmed by perfect proportions or famous styles. This illustrated guide breaks the barrier. Step by image step, you learn that drawing is not talent—it is technique repeated. From sparkly eyes to dynamic hair, each stroke builds identity. Your first character will be imperfect. That is exactly where mastery begins.
Les bases du visage manga étape par étape
Start with the head shape. Shonen heroes need strong jaws; shojo heroines prefer softer ovals. Draw a light circle, then add a chin. The eyes sit halfway down—not at the top. Manga eyes are larger than reality, sometimes half the face. Leave space between them: one eye width. The nose is a small L or dot. Mouths vary from tiny curves to open screams. Use your guide’s reference images for placement. Practice each part separately. Trace, then freehand. After ten faces, proportions feel natural. The secret? Guidelines first. Details later. Patience outpaces passion.
Créer des expressions et des émotions puissantes
Eyes change everything. Wide pupils with small highlights show fear or awe. Narrow, half-closed lids signal boredom or threat. Eyebrows tilt downward for anger; raise one for mischief. Mouths stretch horizontally for joy, form tiny circles for surprise. Add sweat drops for embarrassment, vein marks for irritation, blush lines for shyness. Your illustrated guide shows side-by-side comparisons. Practice shifting one feature at a time: change only the eyebrow angle, then redraw. Emotions become readable instantly. A great manga character tells a story without dialogue. Master expressions, and your personnage breathes.
Proportions du corps et poses dynamiques
Manga bodies use head units. Shonen heroes: 7 to 8 heads tall. Chibi characters: 2 to 4 heads. Draw a simple skeleton—circles for joints, lines for limbs. Shoulders are 2 head widths apart. Hands reach mid-thigh. For action poses, curve the spine into an S or C shape. Avoid straight lines. Use your guide’s reference images to copy running, jumping, or crouching. Trace over photos of real people first, then manga-fy them. Dynamic poses need balance: one foot flat, the other lifted. Practice three poses daily. After one week, stiffness disappears.
Les vêtements et accessoires qui définissent le personnage
Clothing reveals personality before a word is spoken. A long scarf suggests mystery. Torn sleeves show recklessness. High collars indicate formality. Start with the body shape, then draw fabric over it. Add folds at elbows, knees, and waist. Use your illustrated examples: zigzag folds for thick material, curved lines for silk. Accessories complete the design: glasses, belts, headbands, gloves. Keep a visual library. Sketch real jackets, shoes, and jewelry. Then simplify lines for manga style. Remember: too many details clutter. Pick two or three signature items. A unique silhouette matters more than realistic stitching.
Mettre en scène et donner vie à sa planche
Your character needs a world. Start with a single panel. Use a frame, then place your character off-center—never dead middle. Add speed lines for action, dot patterns for shadows. Speech balloons go top to bottom, right to left if following Japanese format. Use your guide’s image tutorials for backgrounds: simple cross-hatching for walls, horizontal lines for floors. Draw three panels to tell a mini-story: expression change, action, reaction. Scan or photograph your work. Review what works. Redraw the weakest part. Every master mangaka started where you are now. Your second character will be better than your first. Turn the page. Draw.